Welcome to Eatance's user manual for adding and managing products to your menus on your Eatance restaurant builder. This manual is designed to guide you through effortlessly showcasing your food and beverage offerings, providing an exceptional experience to your customers online.
Step 1: Login Into Your Eatance Admin Panel
- To log in, visit your Restaurant builder admin and enter your username and password. Click the "Sign In" button to access your account.
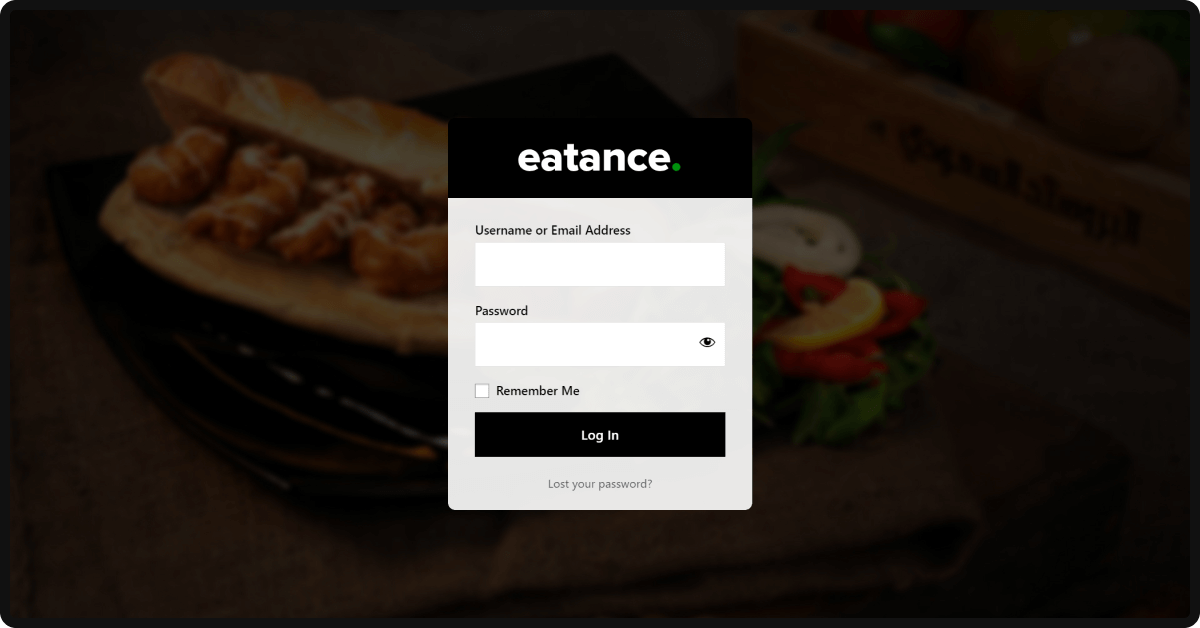
- Upon successful login, navigate to the admin panel, where you will manage your website's content and settings.
Step 2: Adding a Product in the Menu with Quick Add
- Click on the "Menu" option in the main menu.
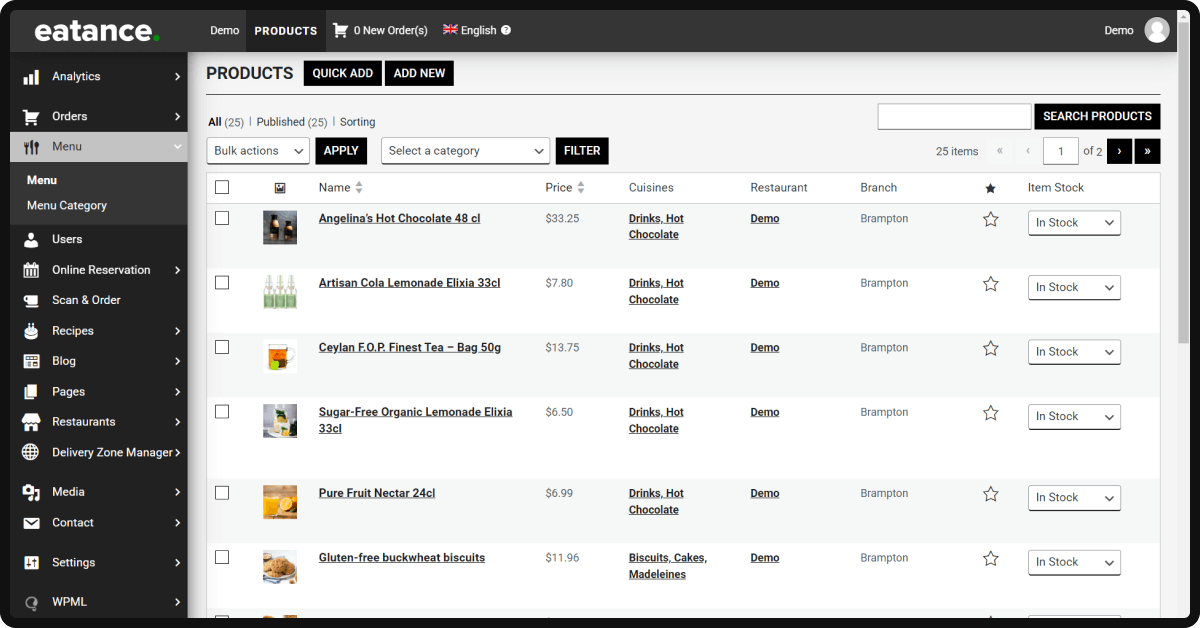
- Choose the "Quick Add" button to open a pop-up window.
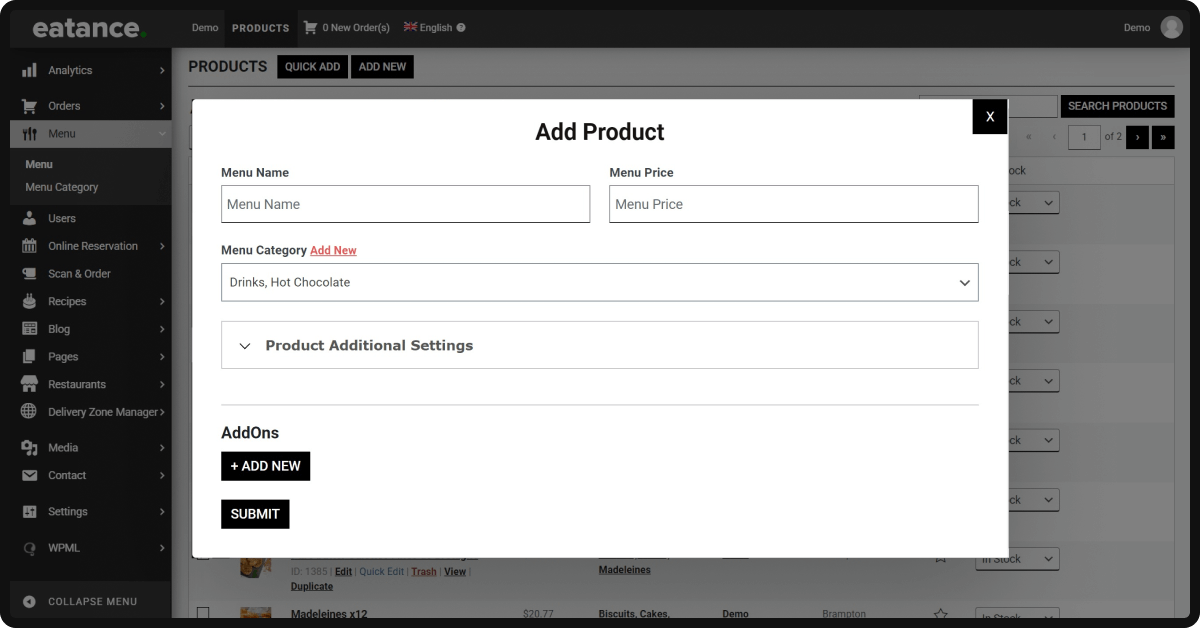
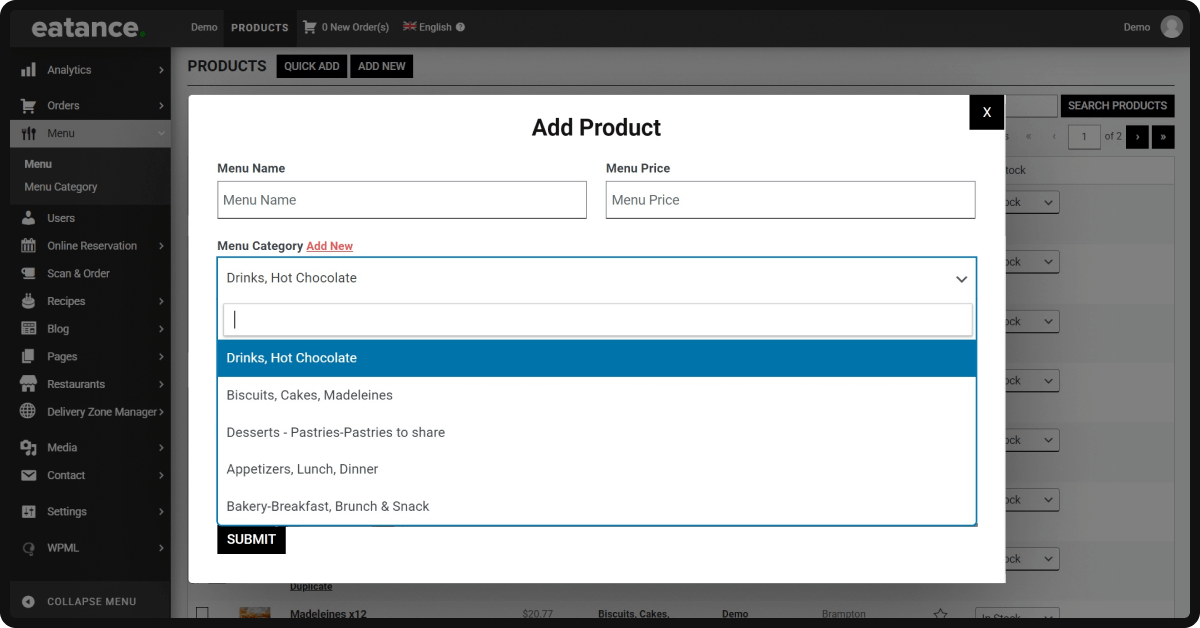
- Enter the product details, such as name, price, etc.
- Choose an existing category or a new one.
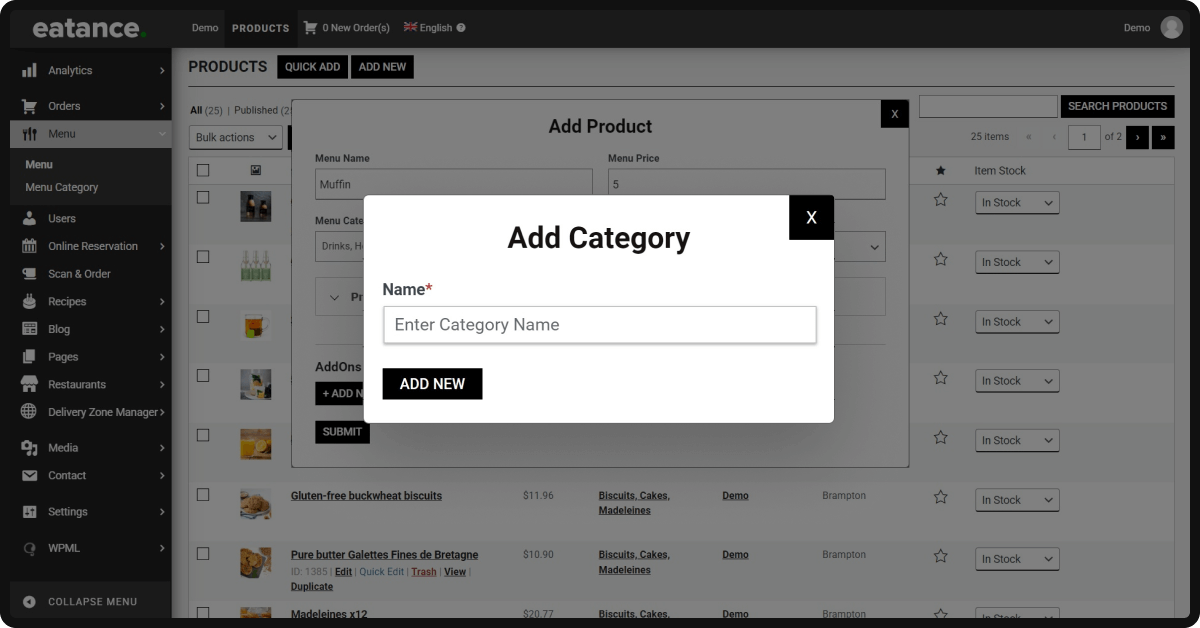
- If you want to add any additional information, photo, tag, short description, or add-ons, you can do so directly in this pop-up
- Enhance your menu's appeal and user experience with advanced customization options.
- Uploading High-Quality Photos: High-quality images of your dishes entice customers. Optimize your product photos for a visually appealing menu.
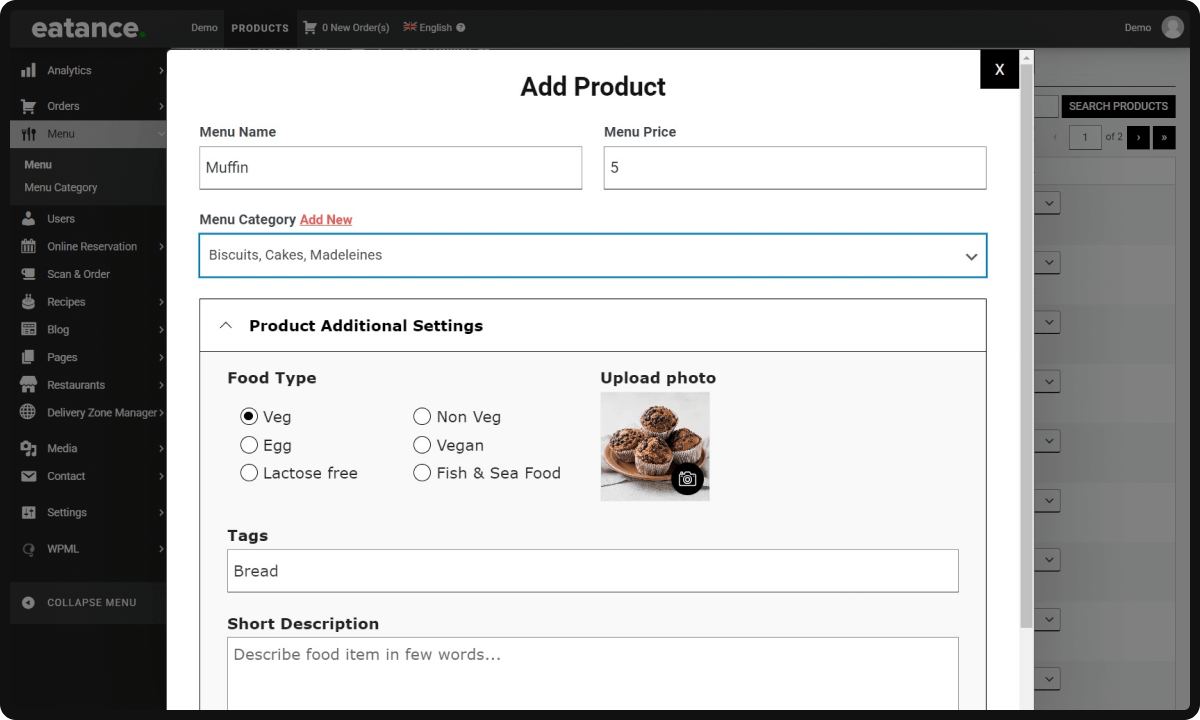
- Utilizing Tags for Better Navigation: Tags help customers find specific items quickly. Use descriptive tags like "spicy," "sweet," or "popular" to aid navigation.
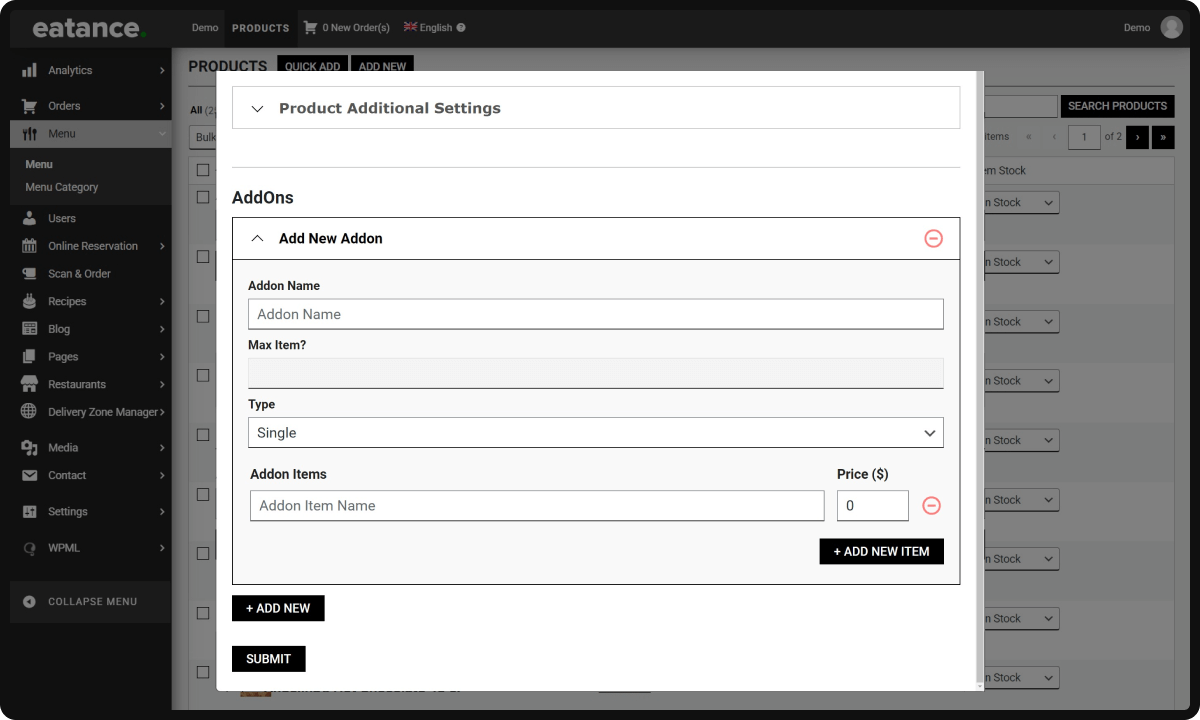
- Offering Custom Add-ons to Customers: Custom add-ons allow customers to personalize their orders. Create add-ons like extra cheese, sauce, toppings, etc.
- Click "SUBMIT" to add the product to your menu.
Your new food product is added within a couple of seconds.
Note: Ensure you provide all necessary information for your product, including name, price, category, and a clear photo that showcases your delicious creation.
Step 3: Update Your Menu
- Once a new product is added, simply refresh your menu to see the changes.
- In case of any issues, either reload the page or clear your browser's cache.
Step 4. Managing Menus with Ease
- Now that you've added products to your menu, let's explore how to manage them efficiently.
Step 5: Editing Existing Products
- In the admin panel, locate the product you wish to edit in the menu and click the "Edit" button.
- Make the necessary changes and click "Save" to update the product information.
Step 6: Deleting Products from the Menu
- Locate the item in the admin panel to remove a product from your menu.
- Click on the "Delete" button. Confirm the action to remove the product.
Step 7: Organizing Products into Categories
- Organize your menu items into categories for easy navigation.
- Create new categories or assign products to existing ones for a well-structured menu.
Conclusion
Congratulations! You have learned how to effectively add and manage menus on your Eatance Restaurant Builder. By utilizing the Quick Add feature and exploring advanced customization options, you can create an enticing menu that reflects your brand and delights your customers. If you have any questions, feel free to contact Eatance support.