A custom dish is any food dish on the menu with options related to the size of the portion, taste preferences, multiple toppings to be added, etc. Users or customers simply have to select the options before confirming the final order.
For example, ordering a pizza online is a custom dish where you select the size, toppings, and more in the addon section. This makes pizza a custom food dish.
It is an incredible option for business owners as doing this will help you increase the order value, even on a single dish. Whereas for customers, it increases the food ordering experience as they can select the addons based on their preferences to get the desired dish.
Understanding the importance of Size-based Pricing with Example:
Consider this scenario:
- You have a pizza in 3 sizes (Large, Giant, Monster) with size-based pricing that is fixed.
- Now, I want to add Extra Cheese as a topping worth $2.
Focus on the next part now, as this one will be tricky.
Selecting the extra cheese and upgrading the pizza size from Large to Giant has to be different.
Restaurant owners ask this is the most frequent question about setting up the addon prices based on size selection.
In this user manual, we will see how to add custom products and, based on the addons, how we add the respective prices for each option. Let us get started!
Steps to Create & Add Custom Products on the Eatance App
Many of our friends would know this as we have covered it in our manual named "How To Create Customizable Product?".
We are explaining it again to others who wish to continue this doc.
Step 1: Log In to Your Eatance Account
All the admin users must be given a set of credentials with a username and password and a specific URL of the Eatance Restaurant Builder.
- Go to the URL where you will be asked to enter your admin username and password.

- Enter your credentials on the Eatance website to access your account.
- Once logged in, you will be directed to your Eatance admin panel.
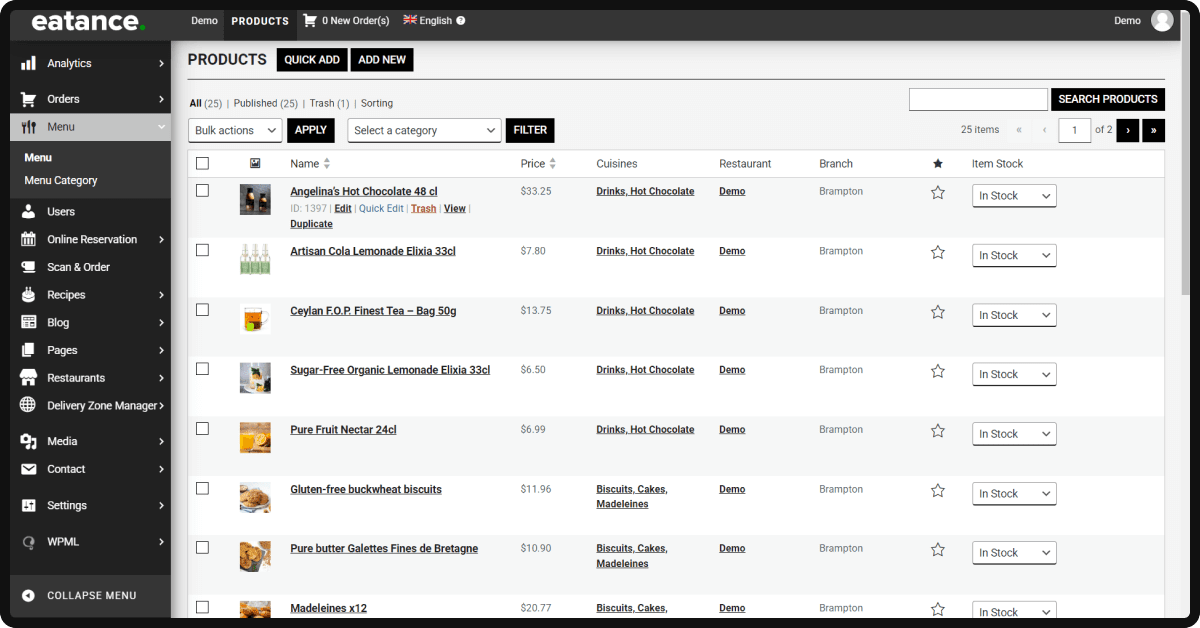
Step 2: Find the Menu Option and Page to Edit
- Select the "Menu" section on the left from the admin panel's main menu.
- Find the "Edit Product" under the "Menu" option, where you have to create a customizable food dish.
Step 3: Configuration of Creating a Custom Food Dish
- Add the name of the food dish in "Menu Name".
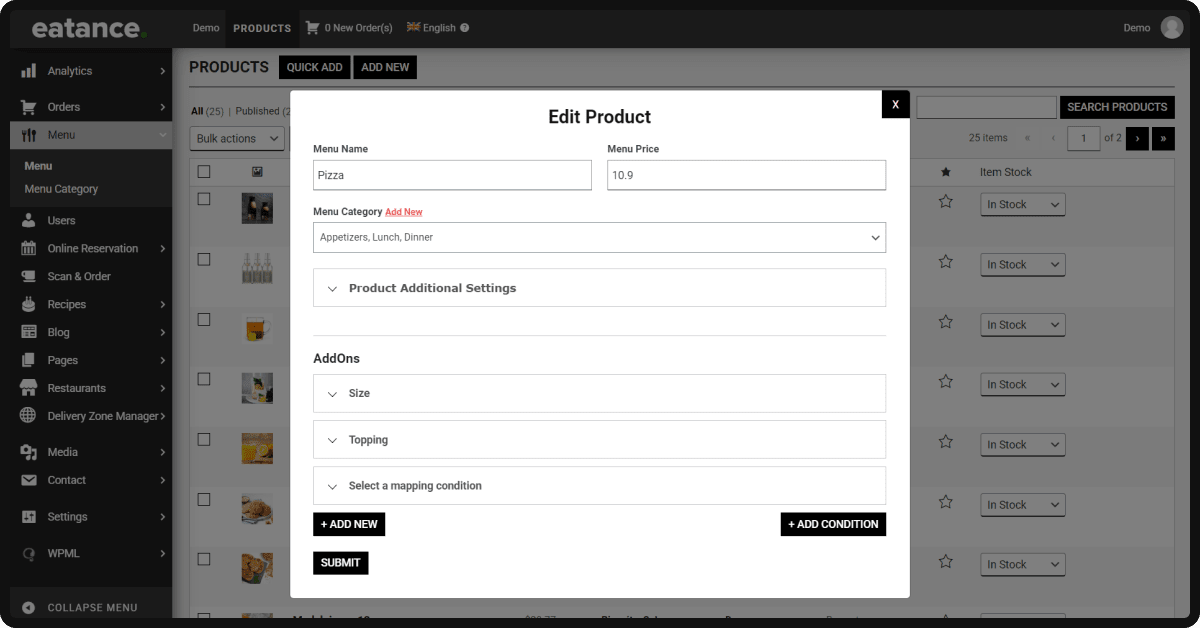
- Select the base value of the dish in "Menu Price".
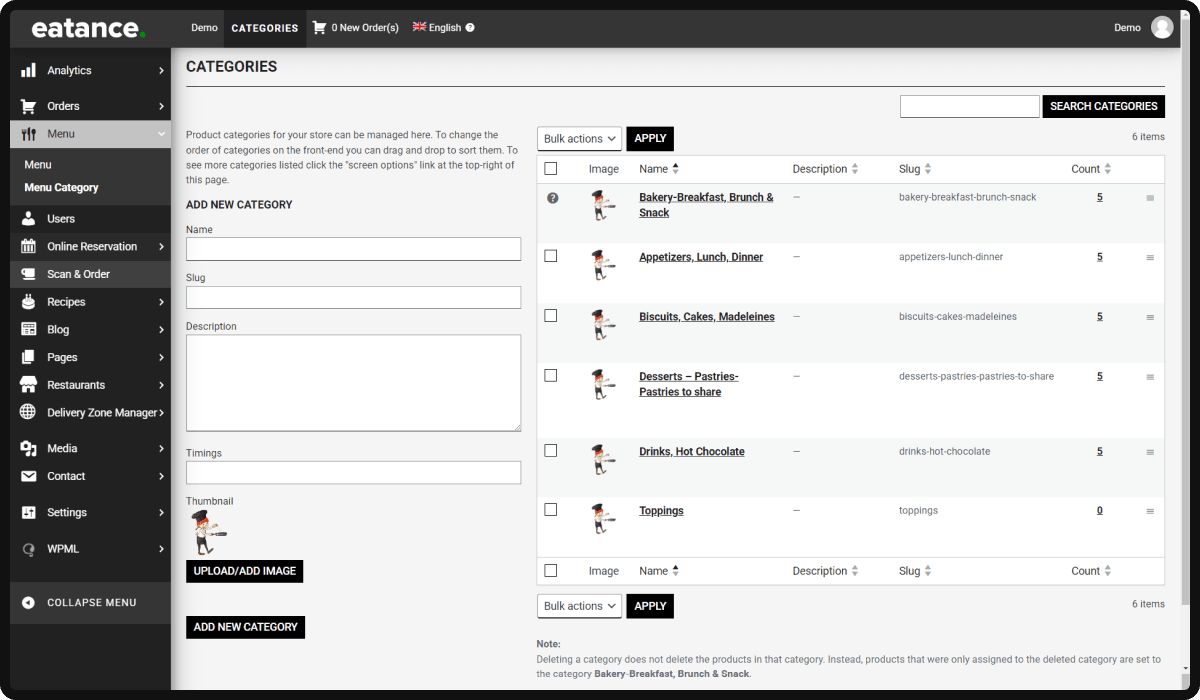
- "Menu Category" helps you assign a particular food category to this dish. (For Example Pizza/Desserts/Beverages).
- Click "Product Additional Settings" to configure customizations based on your preferences.
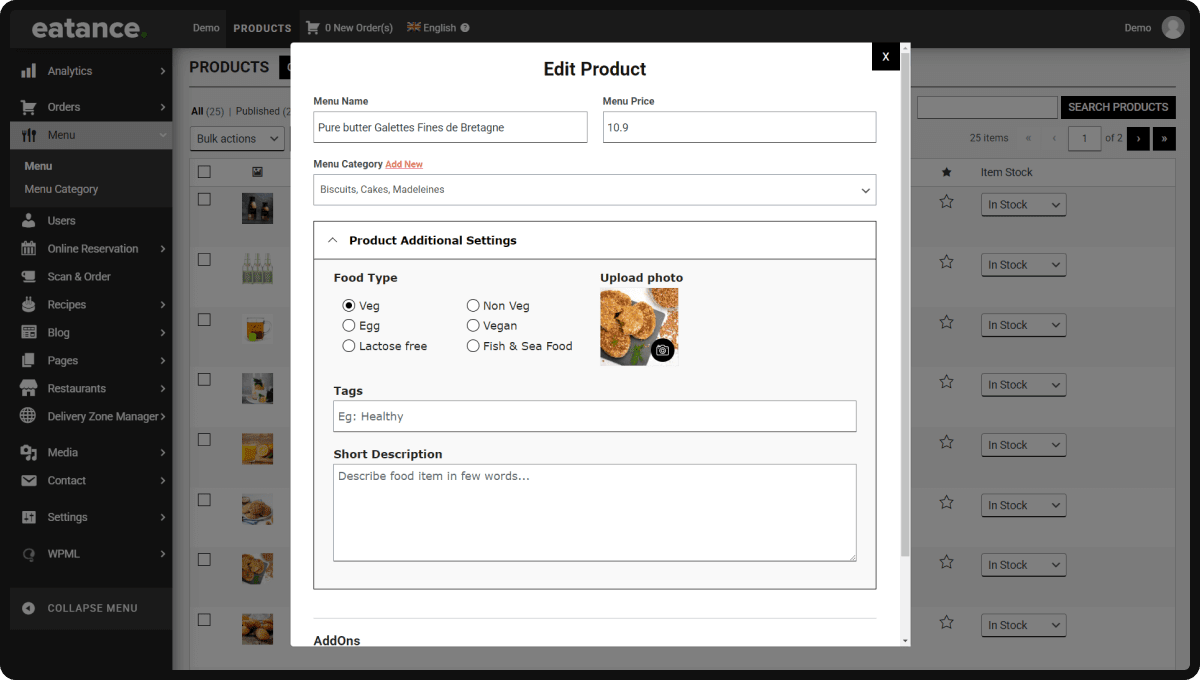
- "Food Type" shows multiple options from which you can select one related to your chosen dish.
- "Tags" is optional if you wish to add relevant tags for this dish.
- The "Short Description" box allows you to write a short yet engaging description of a food dish for your customers.
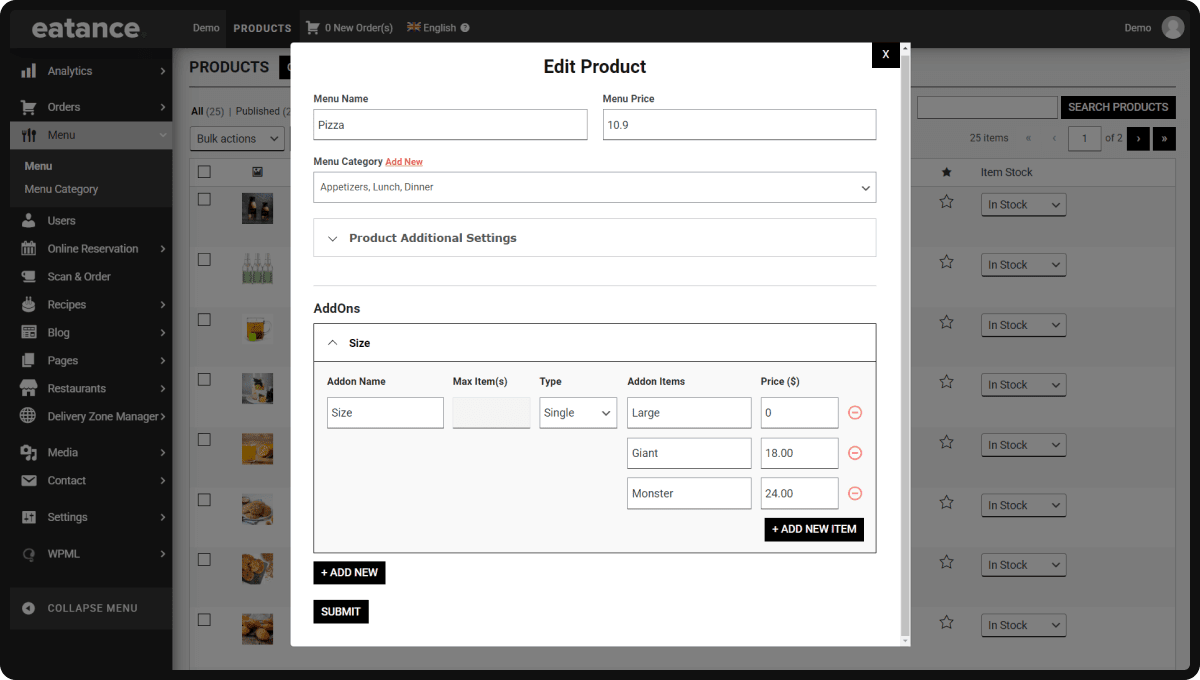
Step 4: Configuring the Addons
AddOns will extend and present the options to be selected to finalize further customization.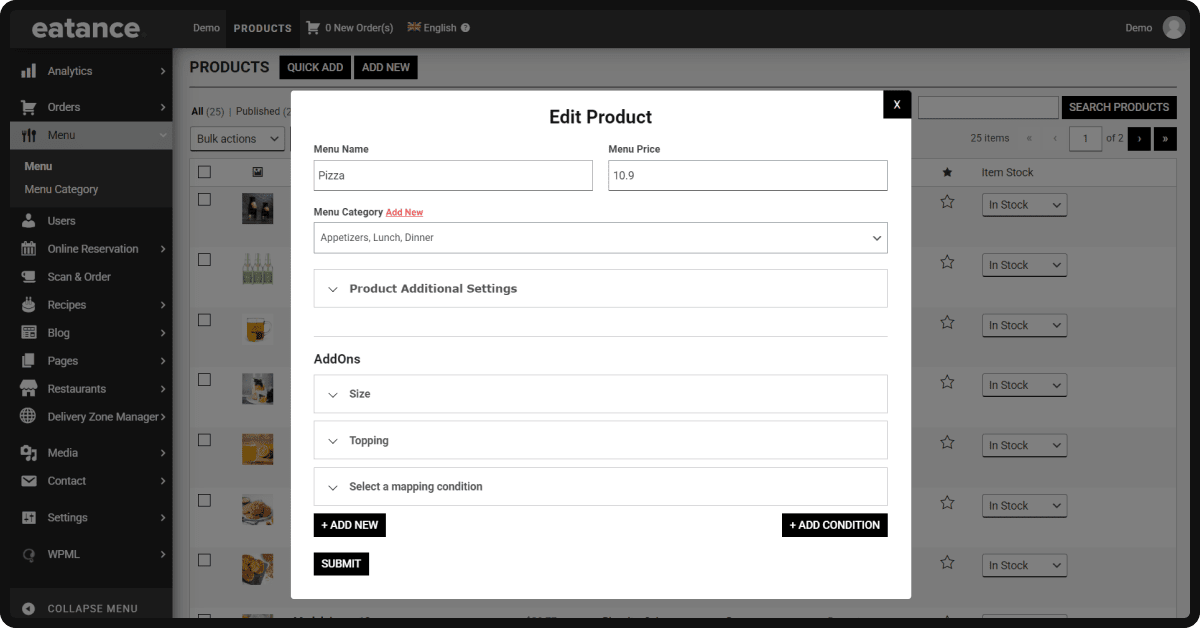
- Click on "Size" under AddOns.
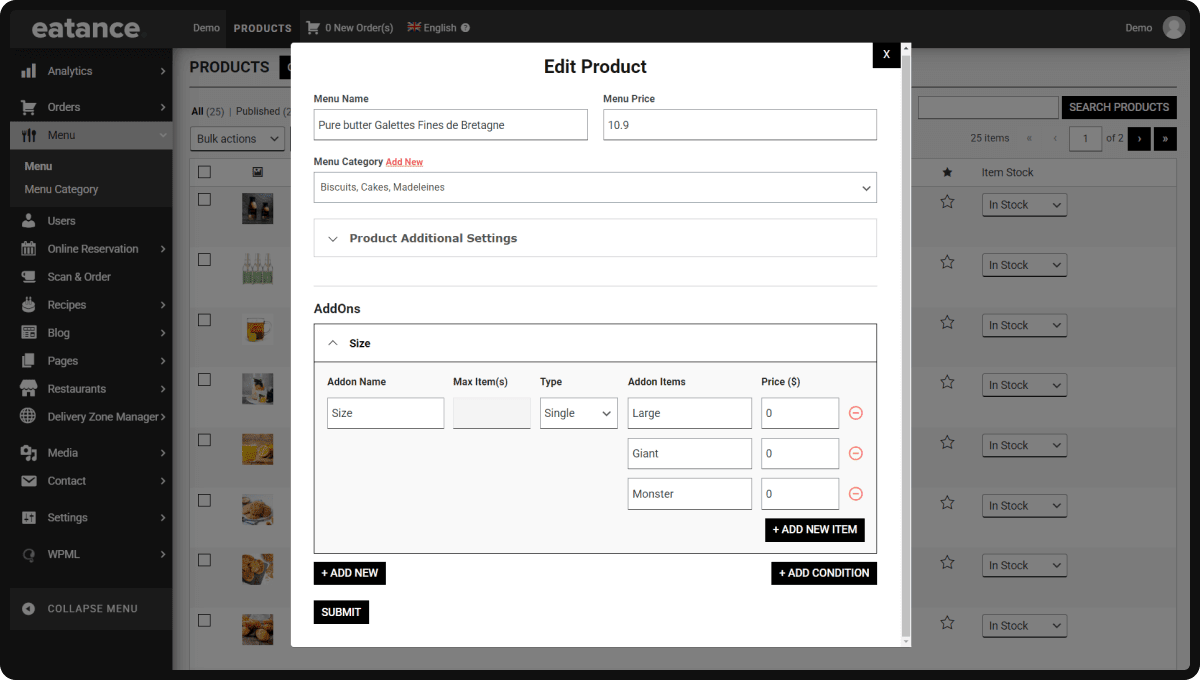
- Two critical details that you have to consider are Addon Name and Type.
- Add an appropriate name to the Addon you wish to offer (Example: Size)
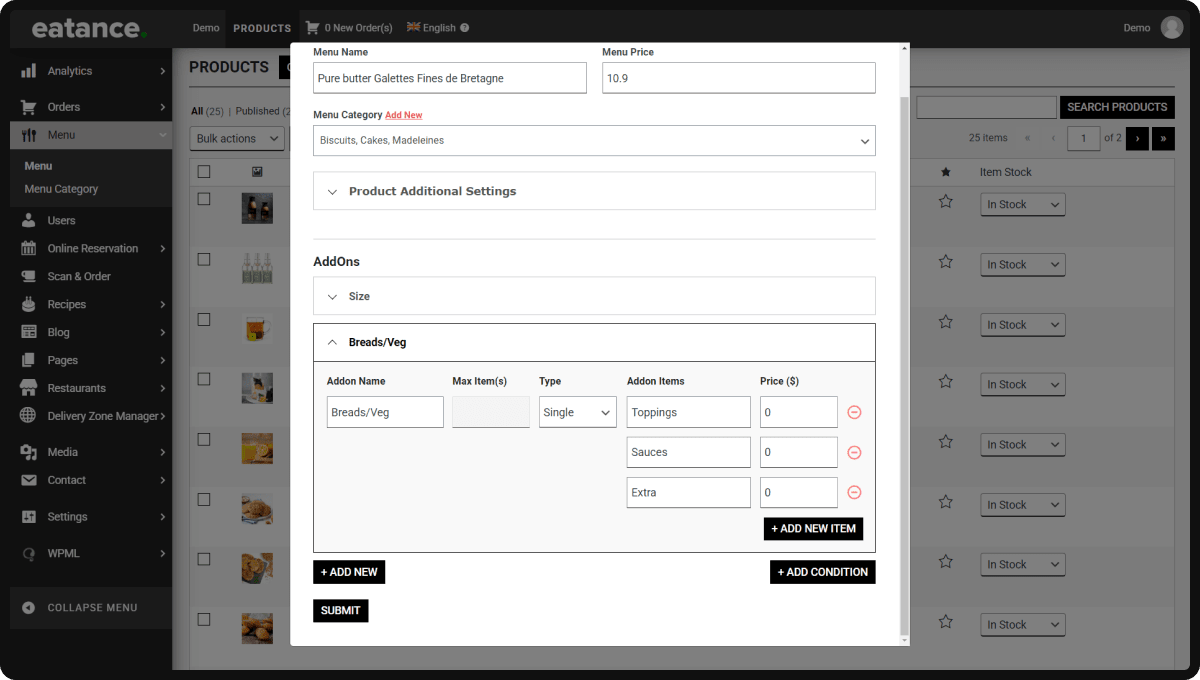
- Addon Name, for example, could be Breads/Veg Toppings/Sauces/Extra.
- Add an appropriate name to the Addon you wish to offer (Example: Size) and create multiple entries based upon your preferences and dishes.
- Select Single or Multiple from the dropdown under "Type".
- Select "Single" if you want your customers to select any single type from multiple options. (Example: Size selection has to be single between Large/Giant/Monster).
- Select "Multiple" if you want your customers to select multiple addons.
- You can mention all the options under "Addon Items".
- Select the base value for every option under "Price ($)".
Step 5: Configuring Toppings Section
- It has the same selection, just like we saw in Addon configuration.
- Choose and select the name for this configuration (Example: Toppings)
- Remember that you must select "Multiple" under "Type" here. This will allow your customers to choose multiple toppings for the dish.
- Mention the appropriate prices for the list of toppings under Addon Items.
- Click on "Submit" to save the configuration.
Steps to Add Condition-based Addon Pricing
- Under the "Toppings" section, click "Add Condition" to create a condition. Click on "Select a Mapping Condition", where you can set and map conditions for pricing.
- You'll see the four columns named "Addon Name", "Addon Item", "Size", and "Price".
- Create a list of all the Addons by mentioning the required information.
Remember the Earlier Example of Pizza to set size-based topping prices:
We explained at the start of this manual.
- Select one size (For example, Large) in the Size column's dropdown menu, and set the prices (Let's say: $2) for all the toppings.
- Then you can select another size (For example, Giant) and set the price (Let's say, $4) for all the toppings.
- Similarly, for Monster size, set the price (example: $8) for all the toppings.
- Once you save the settings, the size-based pricing will be set.
When your customers select the giant pizza, the topping prices will automatically change. You do not have to worry about anything.
If you wish to delete any listing, click "-" at the end of the respective listings beside the price.
Congratulations!!
You have now learned to add custom products and set up the size-based addon pricing, which is a great way to increase cart value for exclusive food dishes like Pizzas.
The Eatance restaurant builder developed this advanced feature after receiving multiple feedback from our restaurant partners.
For more queries, kindly contact our team.