Table and event booking has always been crucial in delivering the best dining experience, optimized operations, and increased sales. In these times where accepting party orders is a great way for restaurant owners to have a competitive advantage and boost sales, it is also an opportunity to increase footfall and customer loyalty.
Considering the importance of reservations and bookings, the Eatance Restaurant Builder offers a client-focused way to configure table and event bookings.
This user manual is a quick yet step-by-step walkthrough to learn how to set up online reservations for events and tables. Let us get started, shall we?
Step 1: Login into the admin panel of Eatance Website Builder
- Enter your credentials on the Eatance website to access your account.

- Once logged in, you will be directed to your Eatance admin panel.
Step 2: Go to the "Restaurant Page"
- In the main menu of the admin panel on the left, click "Restaurants".
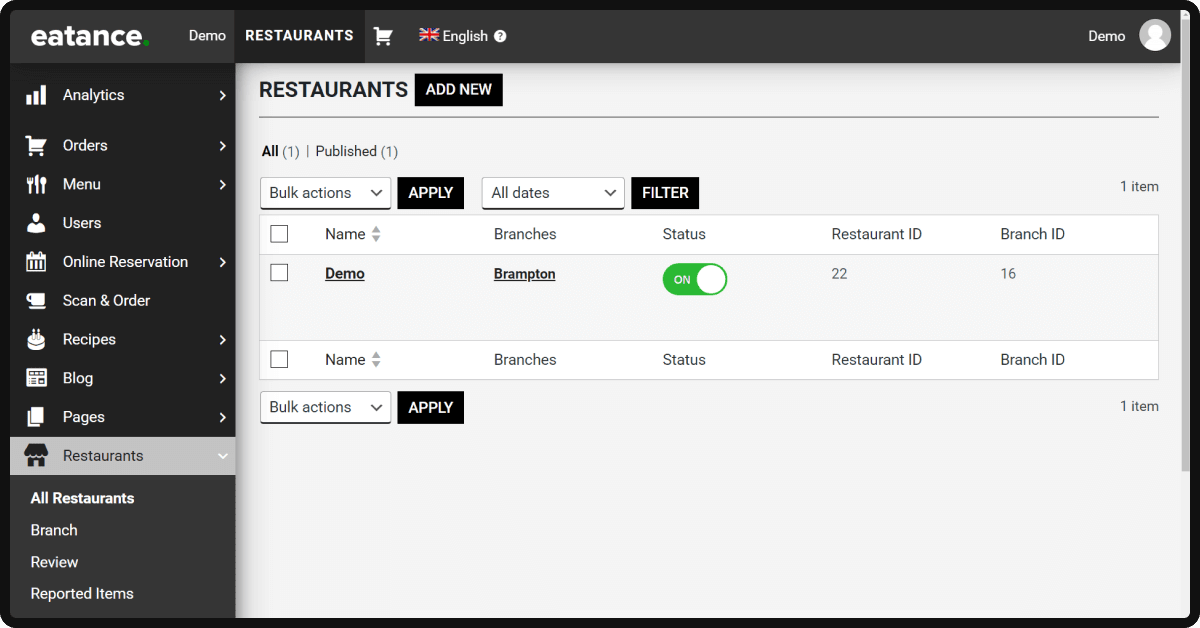
- Click on "All Restaurants," which will show the list of restaurants you want to manage on the page.
- This space is called the Restaurant Edit Page, which shows you the Restaurant's name and Branch, area, Restaurant ID, Brand ID, and Status.
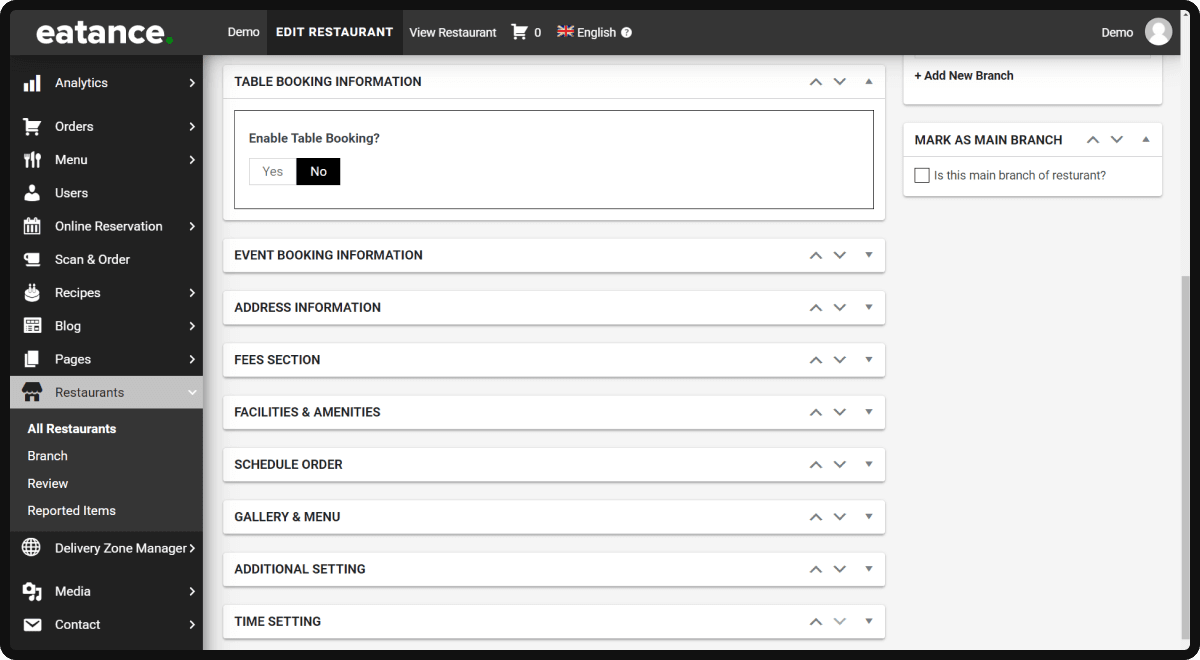
Step 3: Configure Table Booking Information
Scroll down the page until you see the "Table Booking Information", where you can enable/disable and manage the booking information from here.
- Click "Yes" to enable or offer a table reservation/booking facility in your Restaurant. Otherwise, click "No" to stop the table booking feature for all customers.
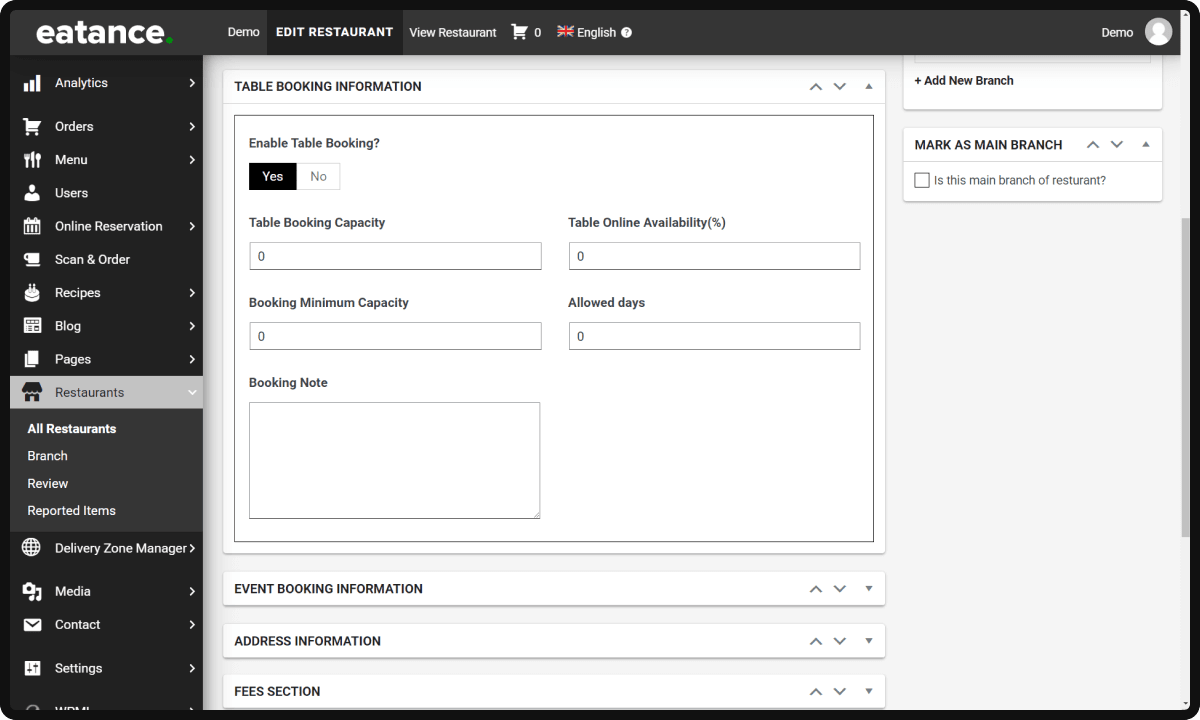
- Table Booking Capacity: Enter the number of tables you want to include for reservations. For example, you have ten tables in your Restaurant, and you want to spare 50% of them for reservations and 50% for walk-in customers. Hence, you have to enter" 5" tables in the box.

- Table Online Availability: You can put a number based on the number of tables you want to spare for walk-in customers and the rest for online reservations.

- Booking Minimum Capacity: This number shows the minimum number of people required to book a table.

- Allowed Days: You can add any number of days to activate advance table bookings. For example, setting up "2" means customers must book a table at least two days before the visiting day.

- Booking Note: You can add any message displayed on the front end for the customers looking to book a table.
Step 4: Event Booking Information
- Enable Event Booking: You can activate or disable it by clicking "Yes" and "No" respectively.

- Event Booking Opening & Closing Times: Based on the morning, afternoon, or evening availability, you can set up timings to display the opening and closing times.
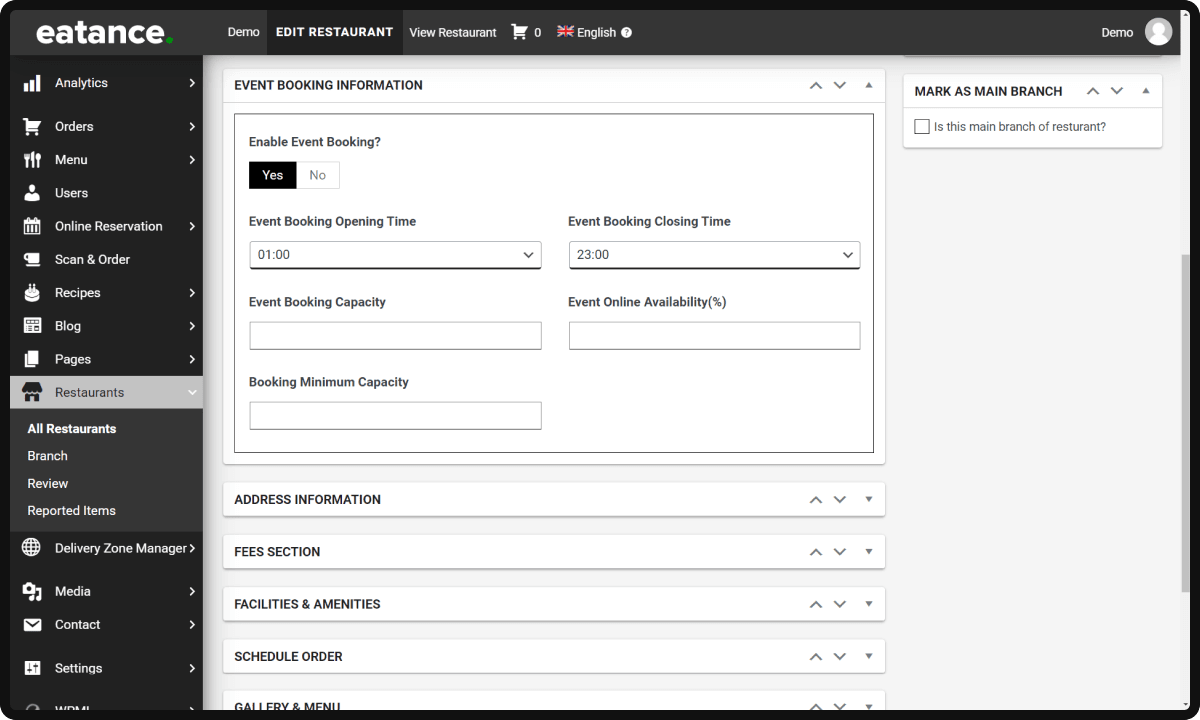
- Event Booking Capacity: Venue booking capacity can be displayed by putting a number here.

- Event Online Availability: Total overall capacity can be mentioned here so potential customers can clearly understand.

- Booking Minimum Capacity: Mention a number that presents the minimum number of people required to take party orders.

Congratulations!! You did it!!
You can now offer event and table booking for your Restaurant using the admin panel of Eatance Restaurant Builder. This nifty feature will help you save quick time in turning on or off the bookings for tables or events.
Cheers!!