Understanding the Importance of the Restaurant Homepage/Landing Page
As a restaurant owner, what do you expect from a website's main page you own? In other words, how will you make your landing page or homepage effective to provide the best food-ordering experience for your customers? The answer is simple. You must showcase all the functionalities and features to help visitors (customers) access the necessary information to perform actions. Sounds difficult? Well, not anymore.
The Eatance Restaurant Builder platform helps you manage the content, offers, availability, etc., on the go from the backend. And in a couple of minutes only. How cool is that? In this user manual, we will see how you can set up multiple things centrally using the Restaurant Edit Page in the backend. Let us know what you can expect from the Restaurant page of the Eatance Restaurant Builder.
Learn the Comprehensive Process to set up a Restaurant Overview on the Front-end using the Eatance Restaurant Builder
Step 1: Login into the admin panel of Eatance Retaurant Builder
- Enter your credentials on the Eatance website to access your account.

- Once logged in, you will be directed to your Eatance admin panel.
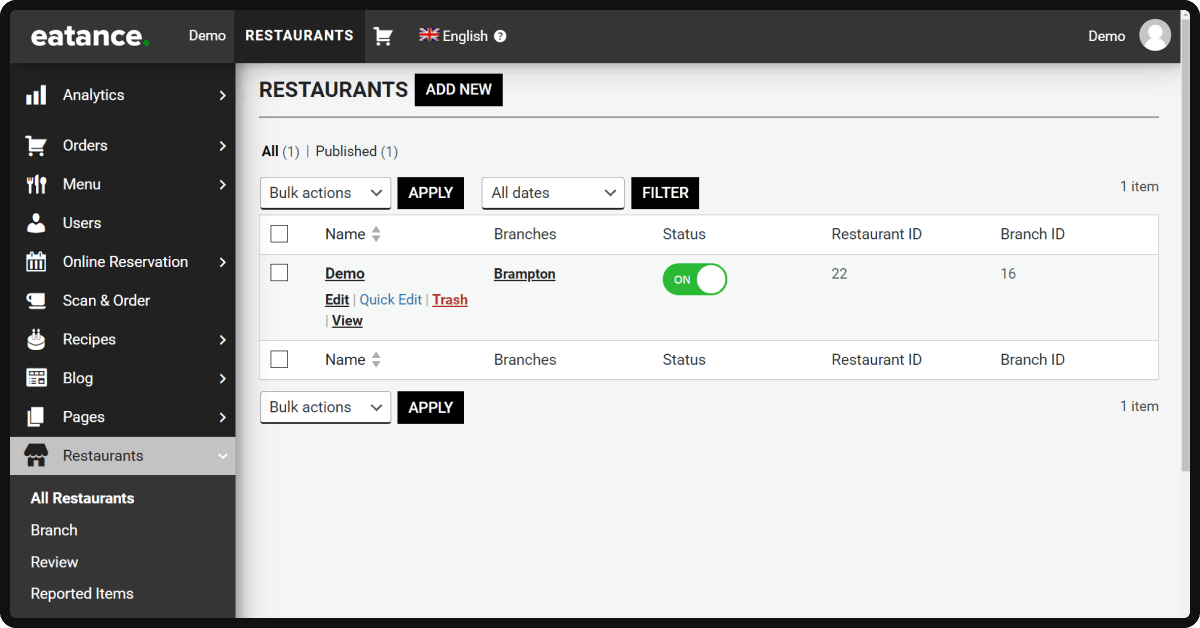
Step 2: Go to the Restaurant Page
- In the main menu of the admin panel on the left, click on the "Restaurants".
- Click "All Restaurants" to show the list of restaurants you want to manage on the page.
- This space is called the Restaurant Edit Page, which shows you the name of the Restaurant and its Branch along with the area, Restaurant ID, Brand ID, and Status.
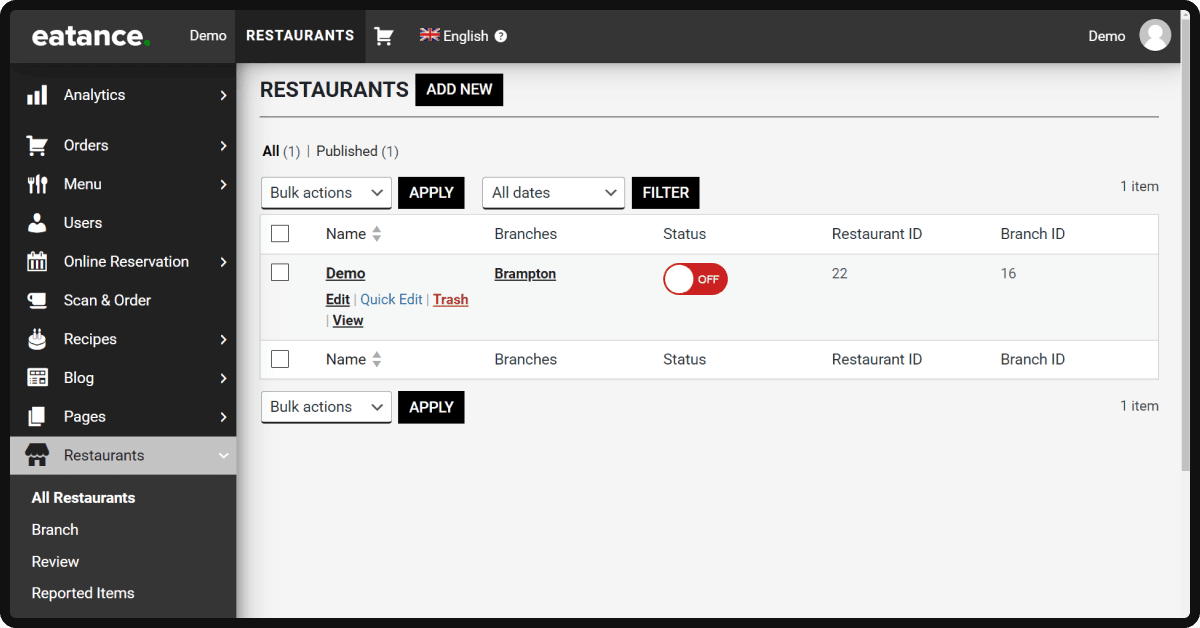
Step 3: Status Toggle Button: ON/OFF
- The status button is an excellent feature the Eatance Restaurant Builder has developed to help restaurant owners go offline/online with a single click.
- The "Status" button is essential before clicking the "Edit" button to make the desired changes.
- If you are thinking about going OFFLINE immediately, turn "OFF" this Status button. No orders will be placed in the system once you do it.
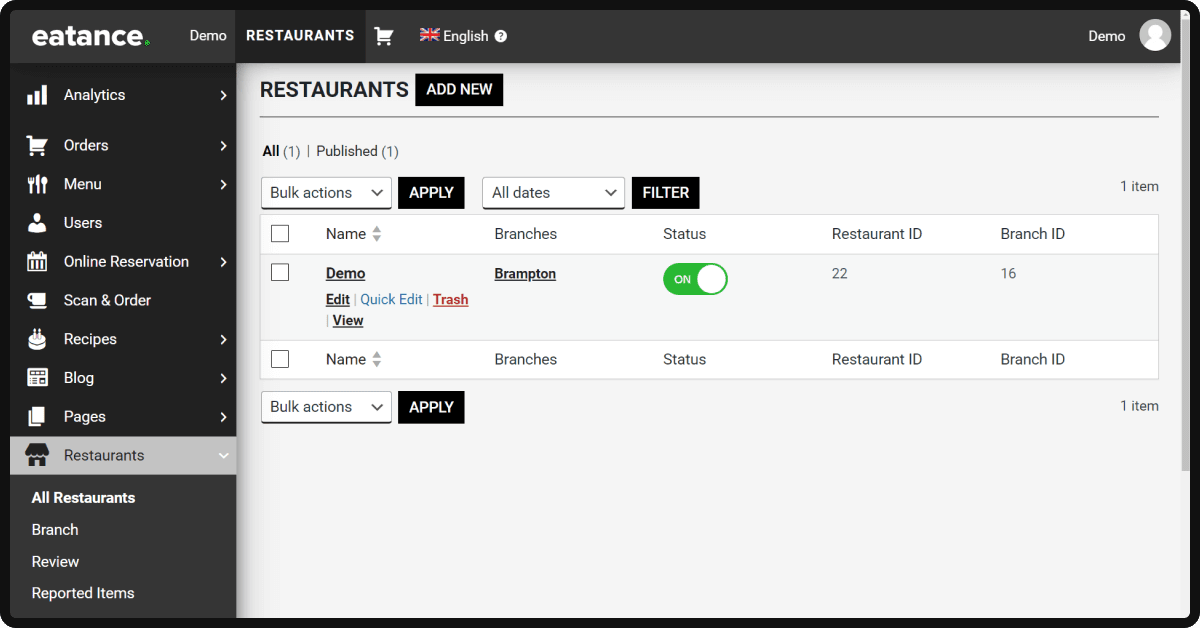
- You can turn "ON" once you are ready with your changes and want to return online again to start receiving orders.
Step 4: Editing the Restaurant Page
Under the restaurant name, click "Edit", and it will open up the Restaurant Edit Page.
Sections you can see and manage in the Restaurant Edit Page:
4.1 Restaurant Name
On the top, you will see the Restaurant name (e.g. Eatance)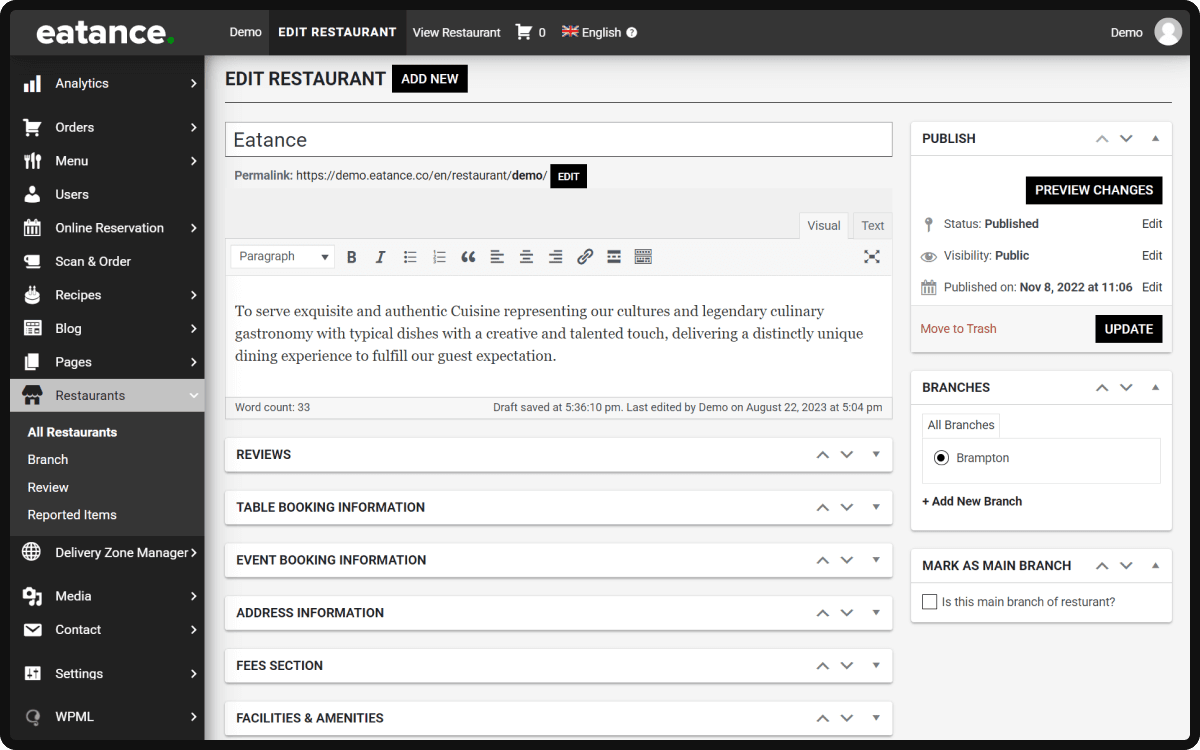
4.2 Content Section for About Us
Underneath that is a section to write About Us content where you can replace the whole range or make necessary edits per your preferences.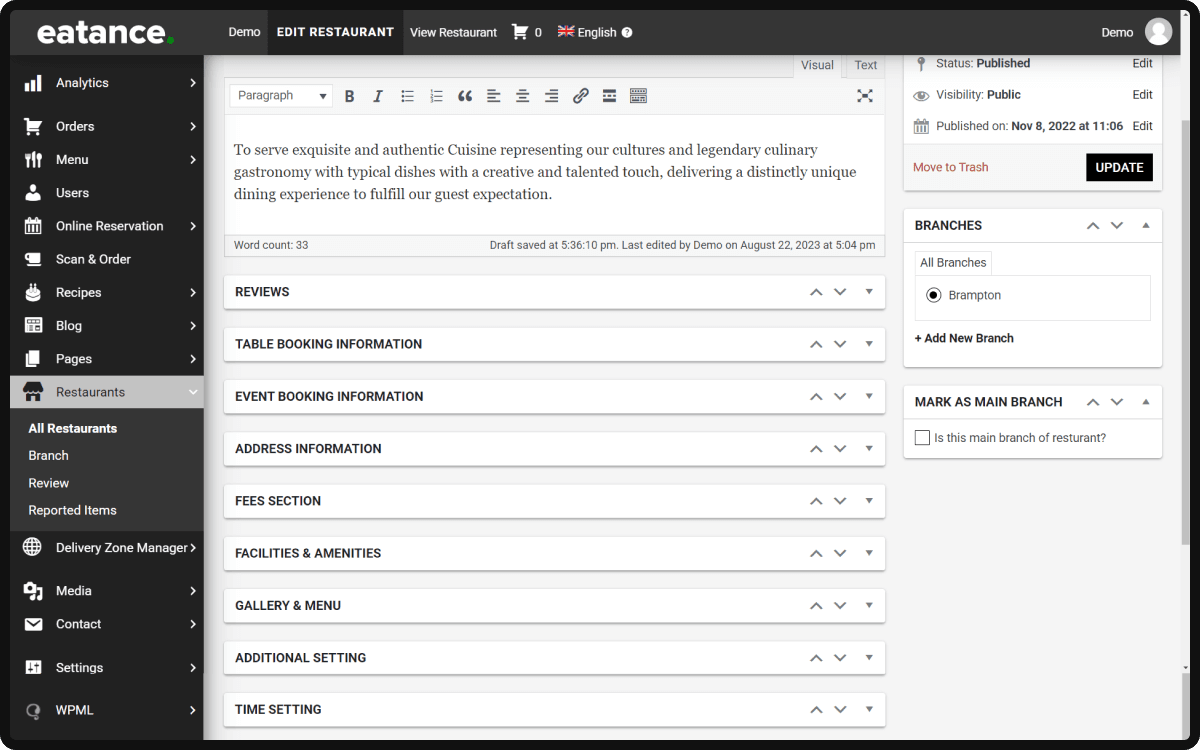
4.3 Table Booking Information
You can enable/disable and manage the booking information.
- Click "Yes" to offer a table reservation/booking facility in your restaurant. Otherwise, click "No" to stop the table booking feature for all customers.

- Table Booking Capacity: Enter the number of tables you want to include for reservations. For example, your restaurant has ten tables, and you want to spare 50% for reservations and 50% for walk-in customers. Hence, you must enter" 5" tables in the box.
- Table Online Availability: You can put a number based on the number of tables you want to spare for walk-in customers and the rest for online reservations.
- Booking Minimum Capacity: This number shows the minimum number of people required to book a table.
- Allowed Days: You can add any number of days to activate advance table bookings. For example, setting up "2" means customers must book a table at least two days before the visiting day.
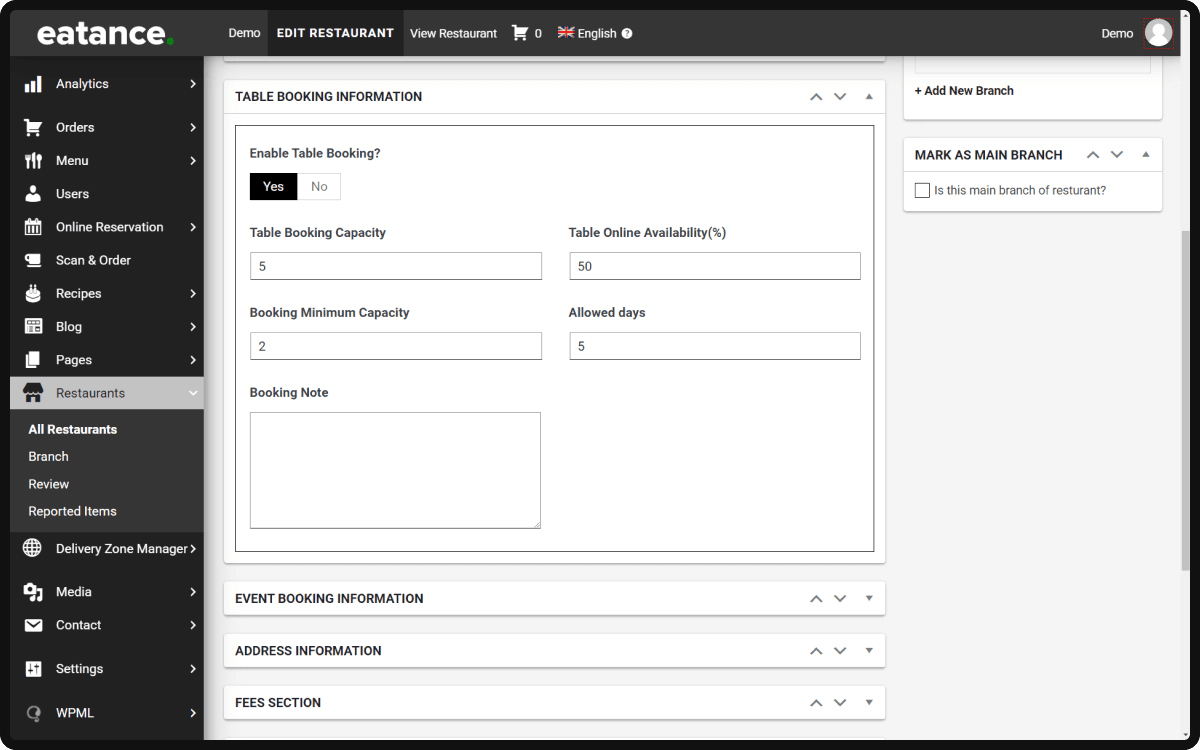
- Booking Note: You can add any message displayed on the front-end for the customers looking to book a table.
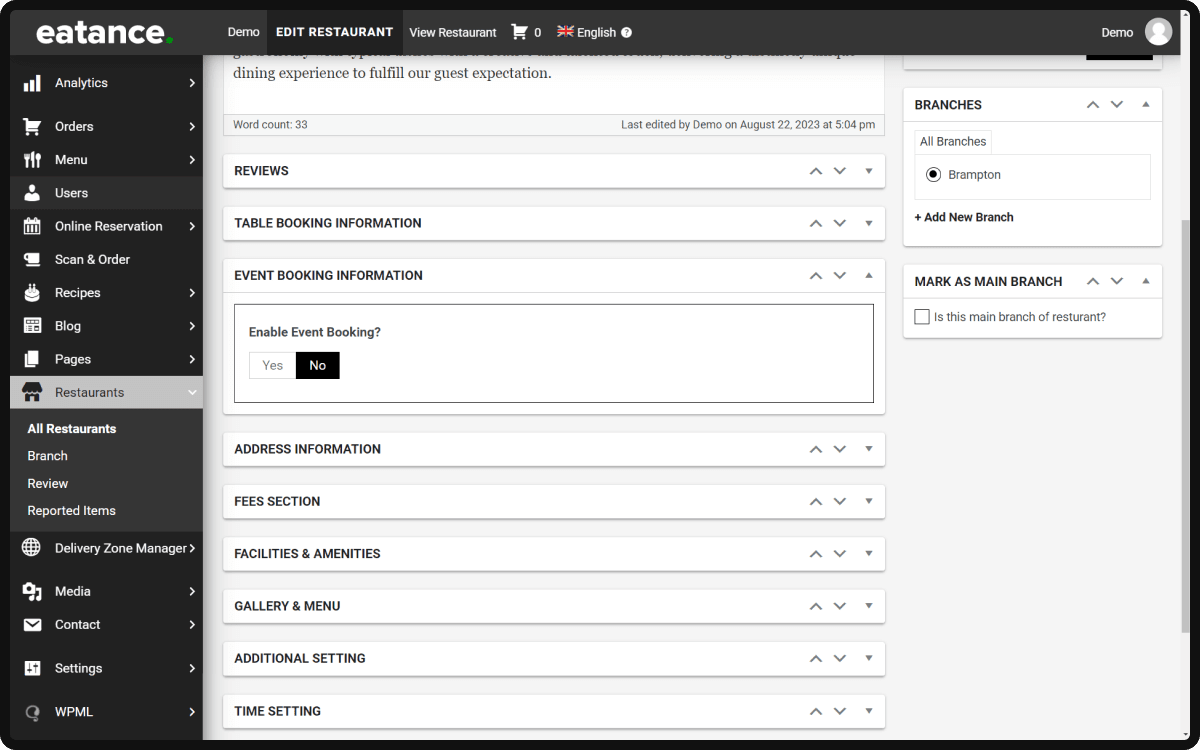
4.4 Event Booking Information
- Enable Event Booking: You can activate or disable it by clicking "Yes" and "No" respectively.
- Event Booking Opening & Closing Times: Based on the morning, afternoon, or evening availability, you can set up timings to display the opening and closing times.
- Event Booking Capacity: Venue booking capacity can be displayed by putting a number here.
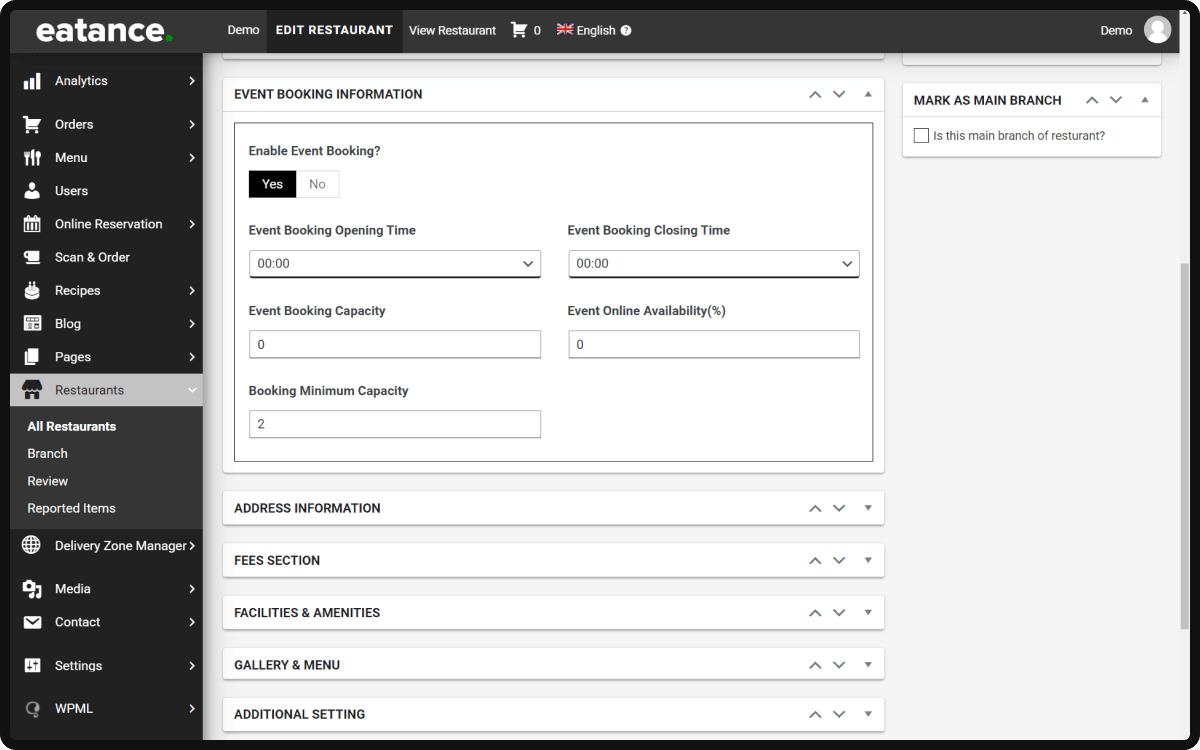
- Event Online Availability: Total overall capacity can be mentioned here so potential customers can clearly understand.
- Booking Minimum Capacity: Mention a number that presents the minimum number of people required to take party orders.

4.5 Address Information
- This helps you manage the address information for the selected branch.
- Also, mention your contact number so that your customer can call you.
- Maps URL feature: Add the URL for the restaurant's location via Maps (Google Maps or Apple Maps).

4.6 Restaurant Service Fee
If you want to add a Service Fee and a Packaging Fee, you can select "Yes" or "No".
Remember that the Packaging Fee shall not be applied to the Dine-in orders.
4.6.1 Setting up Restaurant Service Fees/Charges
- Check "Yes" under the "Restaurant Service Fee" to set up and apply the service charges.
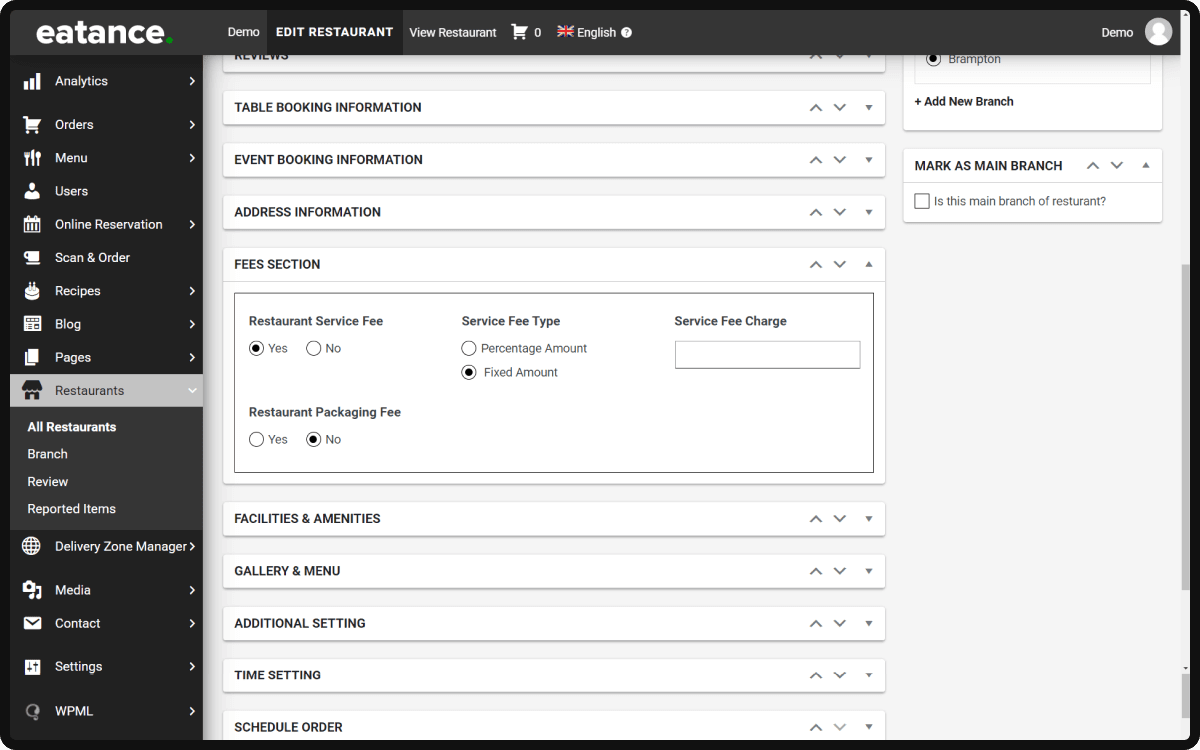
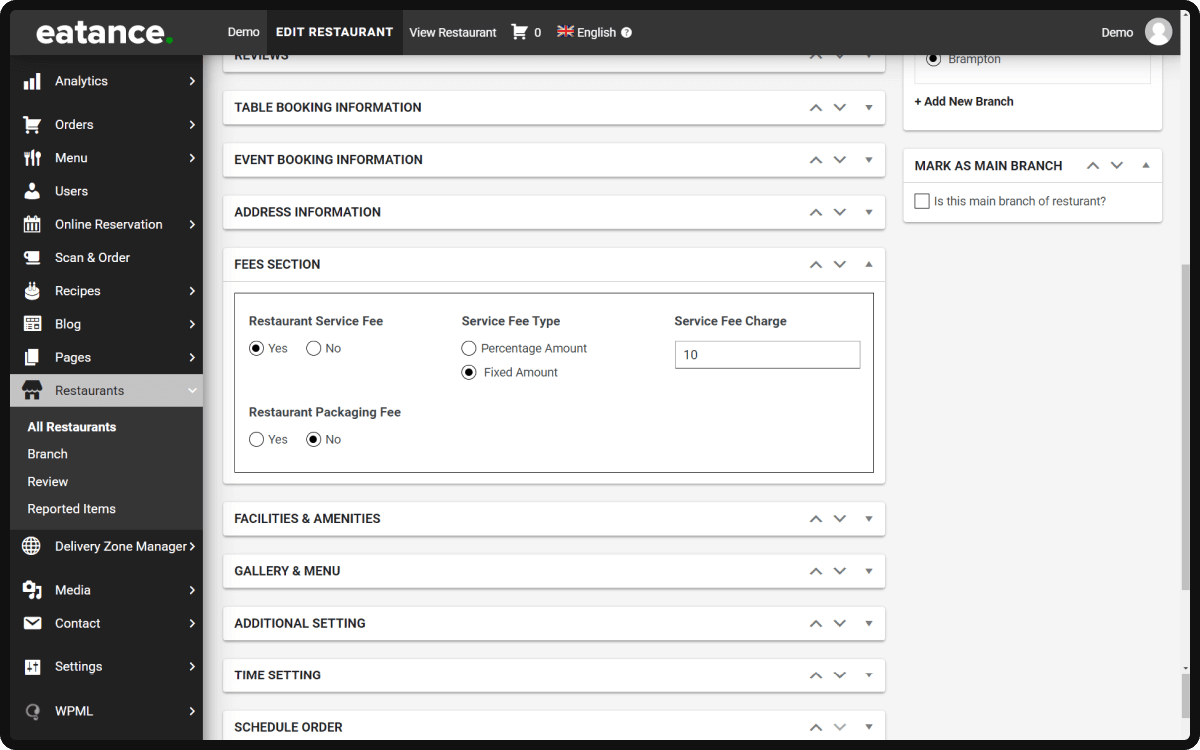
- "Service Fee Type" offers two options: Percentage Amount and Fixed Amount.
- You can select either of the two based on your preference. For example, if you choose Fixed Amount and enter a numeric value of 10 in the box, it will reflect as a service fee of $10 in the front end.
4.6.2 Setting up Restaurant Packaging Fees/Charges
- Check "Yes" under the "Restaurant Packaging Fee" to set up and apply the service charges.
- Like the Service Fee Type, "Packaging Fee Type" offers two options: Percentage Amount and Fixed Amount.
- You can select either of the two based on your preference. For example, if you choose Fixed Amount and enter a numeric value of 2 in the box, it will reflect as a packaging fee of $25 in the front end.

4.7 Facilities & Amenities
- Food Type: Select multiple specific or unique food categories from the list you want to showcase in the digital menu.

- Facilities: Showcase your services (Dining/Delivery) by selecting the optional checkboxes.

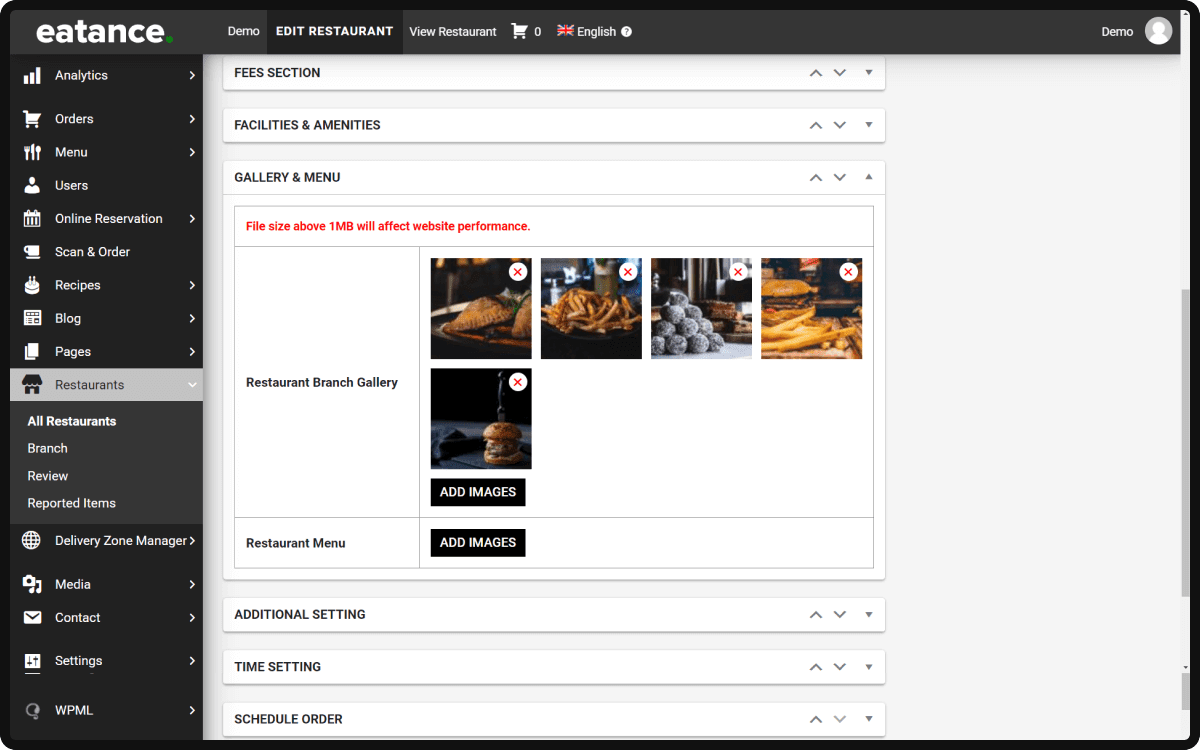
4.8 Gallery & Menu
Restaurant Branch Gallery and Restaurant Menu categories allow you to add relevant images. You can add menu images in the Restaurant Menu section.
- Images of the restaurant ambience on the homepage can be added/deleted here.
- Note: Remember that images above 1MB will affect the loading speed or performance of the website.
- Always optimize the images you want to upload.
- You can use the online tool like TinyPNG to compress WEBP, JPEG, and PNG files.
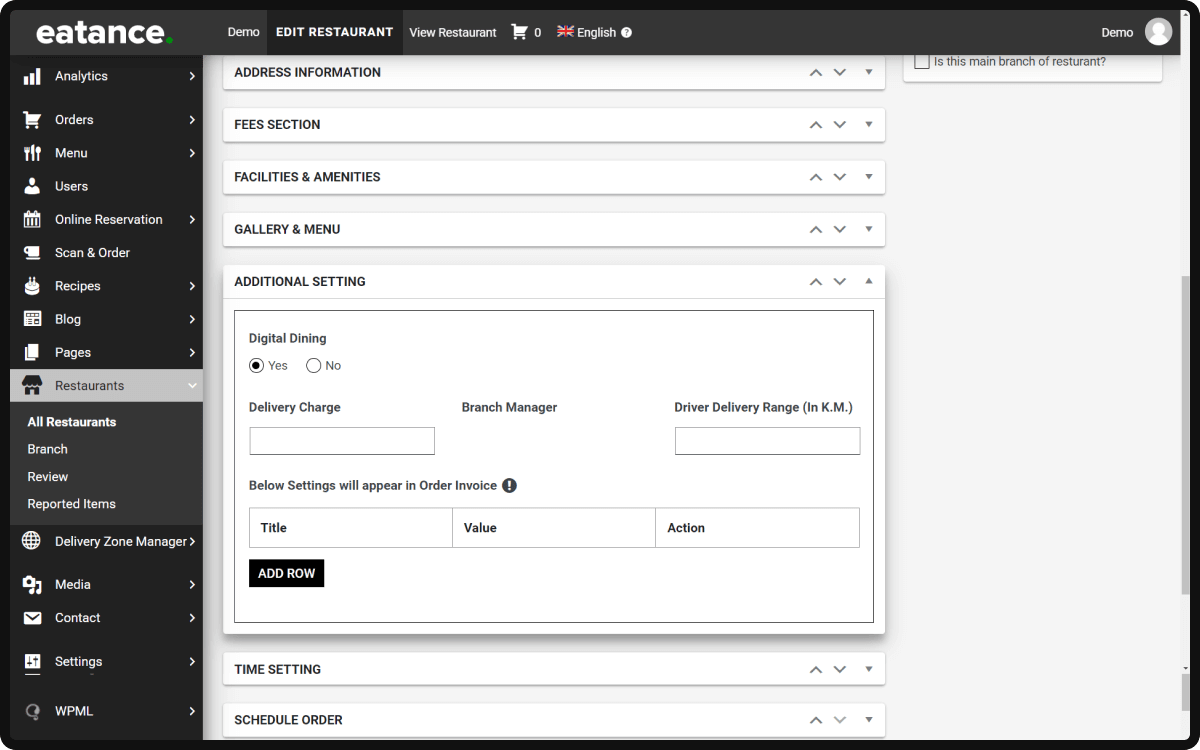
4.9 Additional Setting
- For all the delivery orders, you can mention information for the "Delivery Charge" and "Driver Delivery Range" vicinity in Kms.
- "Order Invoice Settings" can be done based on your preferences from this section.
4.10 Time Setting
This is an important feature the Eatance Restaurant Builder provides that lets you notify your customers about your operational hours.
- Opening Time & Closing Time: Mention your operational days' opening and closing times.
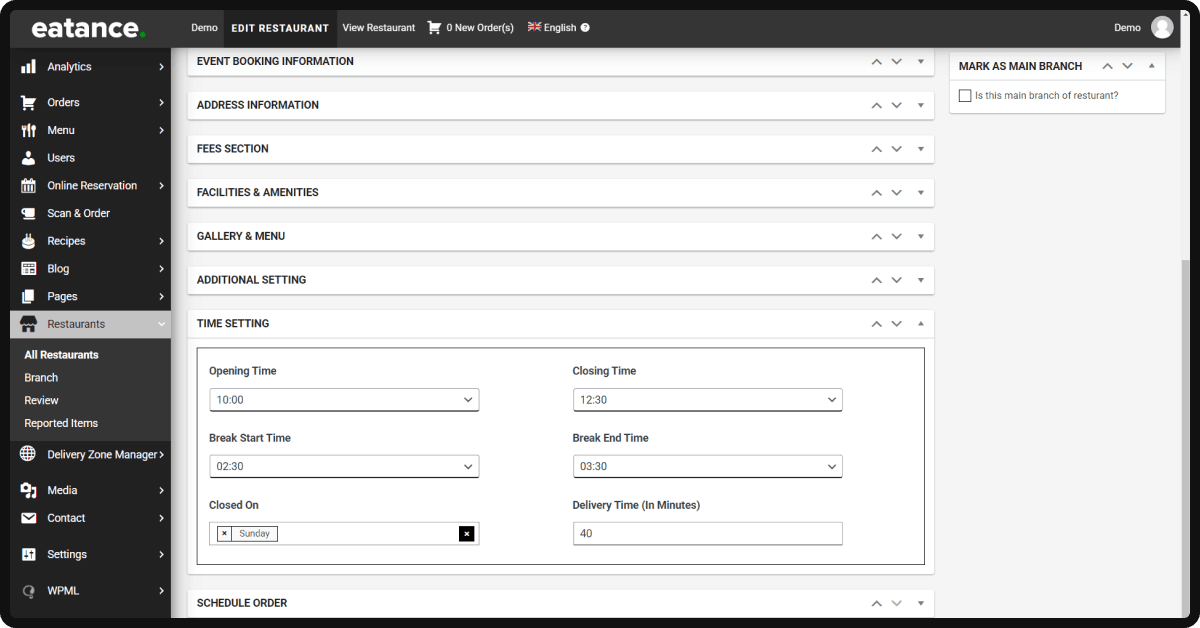
- Break Start Time & Break End Time: In case you are closing in between (let's say, in the afternoon for 3 hours, you can mention the starting time and ending time for the breaks.
- Closed On: Any specific day of the week when the restaurant will remain closed. You can select that day here.
- Delivery Time: You can display the average time in food delivery to be seen by your customers in the front end.
Well, that's it!!
Thank you for your time and patience. We hope you will find this user manual helpful for setting up a restaurant overview using the Eatance Restaurant Builder. Our team is open to your valuable feedback to improve our offerings. Please get in touch with the expert team in case you have any questions or queries. We can't wait to hear from you.
Cheers!!